
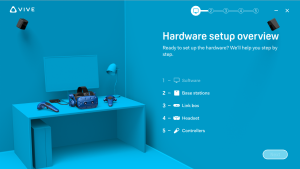
How to setup HTC VIVE Pro
Immersing into the virtual world is exciting and mysterious. However, before diving into this fantastic world, you need to prepare your equipment and install the virtual reality hardware. This post will give you straightforward guidelines to set-up virtual reality (VR) hardware based on HTC-Vive-Pro.
1. Download & install ViveProSetup.exe
 First, you should download ViveProSetup.exe software from here and install it on your PC. You need to create an account in order to login to STEAM.
2. Base stations
Installing the base stations of HTC Vive Pro is the second step to run any VR application.
Requirements
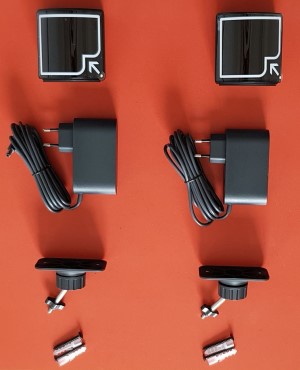 Before installing the base stations, you need the following materials which you can find them in the HTC Vive Pro package.
- 2 base stations
- 2 base station power adapters
- 2 mounting brackets
The play area
Think and decide about your play area.
- Room-scale: you can move within an area.
- Minimum area: 2 m * 1.5 m
- Maximum area: 6 m * 6 m
- The base stations should be mounted at least 2 meters above your head in two opposite corners with an angle of 30 to 45 degrees down, for accurately tracking your play area. They should be placed no further than 5 meters apart.
- Move all furniture and other obstacles out of your play area.
- Standing/Seated: you should only stand or sit down and play the game.
- no minimum size requirement.
The status light
After installing the base stations and plugging them to a power outlet, you can find a status light on both base stations which shows:
- White or green: in normal mode.
- Blue or blinking blue: when waiting to stabilize (if it remains in this state, check if it is mounted securely or on a surface that’s not prone to vibration).
- Blinking red: when there is an error.
3. Link box
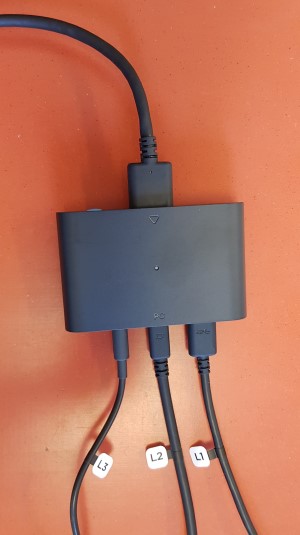 You can find the link box and its components (1 USB3 cable, 1 Display-port cable, and a power adapter) in the HTC Vive Pro package. Follow these steps to connect the link box to your PC.
- Connect one side of the USB3 cable (L1) to the link box and the other side to a USB3 port of your PC.
- Connect the Display-port cable (L2) to the link box and to the same graphics card that is connected to your monitor.
- Connect the power cable (L3) to the link box and the adapter to a power outlet.
4. Headset
Now, it is time to bring your HTC Vive headset. Just plug its cable into the link box and press the power button on the link box. Then, wait for Windows to install the drivers.
5. Controllers
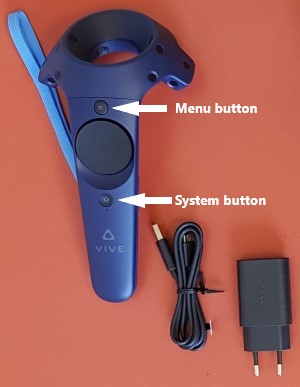 The final step is to install the controllers. You can find two wireless controllers and their power adapters in your HTC Vive package. Turn the controllers on by pressing and holding the system button until hearing a beep. Once the controllers are turned on, their status light is blue for the first time. Then, you should pair them with the headset by just pressing and holding the system button and menu button at the same time. The status light turns green when the controllers are paired.
Use the power adapters only when you need to charge the controllers.
Conclusion
This post gave you simple and straightforward guides about how to setup your HTC Vive Pro. After setting up the hardware, you should simply calibrate your hardware and setup the room scales, using SteamVR Room Setup tool. Do not hesitate to contact me, if you have any question regarding this post or calibrating your hardware.